Saturday, December 8, 2007
More work with Tim's tutorials
I am thoroughly enjoying following along with Tim Holtz tutorials for 12 days of Christmas tags. Sure I have to adapt a lot to the supplies I have but so far I have enough to learn the techniques.
Day 3-Distress embossing powder...Oh this one was so fun to color the image with the distress powders and dump it off all at one time---what a surprise of how good it looked and of course the hardest part is letting the embossing powder cool after heating.
Day 4-Custom making an inkpad--to be done later
Day 5 Alcohol inks-the difference from traditional polished stone is that at the end one drizzling small droplets of blending solution on the ink pieced to whiten some areas and make it look like snow. Also inked the ribbon, beads and bells with the felt used with alcohol ink.
Day 6-Pearlized Shimmer Mist & using a mask
As always Tim presented a few trick that I was not familiar with using. Again anothe fun tag!
Note caribou live in this part of Alaska-may their domesticated sisters, reindeer soon be making their annual trip to your house!
Thanks for looking!...Jan
PS-Did you know you can double click on a picture if you what to see a larger version?
Tuesday, December 4, 2007
Altering a sock
I proceeded to paint the main base gold with red trim. I inserted a piece of cardstock to keep from painting the inside of the sock too. Hmm-that stretched the sock making a true looking stocking. Oh the most fun was scouring the store and my stashes for embellishments. Once I found the main flower which is "iron-on art" which is designed for jackets etc...I was happy with it as a fine focal point...so I was off and running. Gold vines, felt rick rack, crystals, ribbons, glass beads, sequins,buttons...oh I couldn't stop stickles was needed too! Yep, I have always like lots of sparkle and frill...and no time like Christmas to enjoy it all! So a little sewing, a little gluing and tons of fun later it came together!
Sunday, December 2, 2007
On the first day of Christmas!
Day 1-Saturday December 1-Grungeboard and crackle
paint Moose searches forest for perfect Christmas tree.
I had to try my crackle paint (antique linen) on regular chipboard which provided a green base. (Thanks Linda for the tree tucked into my stocking!) I also added crackle paint to the tag and sponged fired brick distress ink after the paint was dry. Birch trees and pines fill the forest at my house so I added a piece of birch bark to the background.
Day 2-Sunday December 2-Dabbler Acrylic Paint
Let it Snow!
Tutorial was using the acrylic paint as a resist. Lots of bling was suggested for this one--that's the fun part for me!
Christmas with a twist
The twist for Saturday Stamper’s Challenge this week is to create something that does not use Christmas Specific pictures, like Santa Claus, or a Christmas Tree etc or the word “Christmas”. So the challenge was on to create a Christmassy look using only colors and patterns etc.
Sorry I twisted and turned the card but just could not capture all the sparkle and bling on the image to share with you.
Sunday, November 25, 2007
With a little help from my friends
Update-Sunday Dec 2nd-Thank you one and all for giving me some great ideas. I hope to use the stamp soon and look forward to posting here what I decide to do first. I used the computer random number to select one person to send the stamp to...and the winner is Cheryl/cakvd. I will get it ready this afternoon so all I need is an address.
I received this stamp with a recent order. Nice stamp but I am not sure how to use it. The brown card stock is regular 4.25x5.5 size so you can see it a large image with not a lot of space to be very creative. So as I ponder, I would appreciate your added suggestions on how to use it. If you leave me a comment with your idea I will be happy to include you in a random drawing for the unmounted stamp of this santa image. I will close to make the drawing on Sunday morning, Dec 2. Thanks for your help!
A beautiful season
Saturday, November 17, 2007
Creating tone on tone
Saturday, November 10, 2007
Tag It!
This is the Shack's color challenge this week.- red, green and cream but not a Christmas item.
Thanks for looking!...Jan
Sunday, November 4, 2007
Weekend stamping
The Saturday Stampers challenge this week is a collage. I enjoy doing some freestyle collage work and don't have many collage stamps. However, I just purchased the new Hero Arts collage Christmas stamp...so I felt I had to get some ink on it. So this is my first card with it.
As part of the creative team over the Stamp Shack I have the assignment to post a technique challenge every first Friday. This week's challenge was a direct to paper background. I have been playing lots with the technique. Here is one of my samples.
Thanks for stopping by!...Jan
Saturday, October 27, 2007
Putting on the Grunge for Halloween
Monday, October 22, 2007
Time flies!
The month kicked of with World Card Making Day. I was busy throughout the weekend itself with thee Stamp Shack celebration of it's the 1st birthday and coordinating some challenges there.
And once the weekend was over those fun folks at 2 peas just don't ever want to stop so the challenges went on for a full week...and now weekly challenges continue too! I worked on about 15 projects during the first week but during that instensive pace one just stops counting. Here's a few photos of my favorites from the week.
One of my first challenges was to make an item that was for the Thanksgiving table. The template for the cup above is from Sherry at the Stamp Shack. I used a watercolor resist on the cup which was lots of fun!
Tami offer a challenge that including using a sheet of music on a card. I had fun working this raven!
Of course I had to try my hand at the new technique challenges offered.
This one features a process of using Perfect Pearls and then combinding it with distress inks. Of course the results are all shimmery which can not be captured in a photo.
The other technique I enjoyed was creating an embossed background and then rubbing over it in a resist manner with metallic rub-ons. They come in a little tray like a paint palette. Mine had been sitting in my drawer for a few years because I had never found instructions. I was very excited to finally put them to use!
Thanks for stopping by!
Sunday, October 14, 2007
Hope for a cure
Saturday, October 6, 2007
Stamptoberfest Oct 6-13th
Supplies needed: Lumiere (perhaps a gold, pearl white, or silver if you are only buying one color). Dye ink, glossy white paper, popsicle stick or something to stir paint, a pallete something like a coated paper plate/ recycled CD etc; about a foot of cheap plastic wrap or a piece of plastic grocery bag; sponge or brayer; tissue.
To create a resist background:
Use something like a wooden popsicle stick to stir the Lumiere paint and then place a doable about the size of nickel on a coated paper plate, a CD disk or the like.
Wad up a small amount of plastic wrap (stiffer is better).The wrinkles in the plastic will add interest to your background. So hold it in your hand like a stamp bounce it back and forth between the paint and add your glossy white card stock.. To regulate the coat of paint I generally lightly tap off some next to the paint doable after each coating. The background will have a significant amount of white space when completed. I use a heat gun to set the paint and insure any thick areas are completely dry.
You may choose to use a sponge or a rubber brayer to cover your background with dye ink. Immediately after covering with ink take a tissue and gently shine paper in a circular motion, removing ink from the Lumiere. Your background is then ready for use.
If you have trouble finding Lumiere-you might check the local JoAnn’s. In there fabric painting aisle they carry prepackaged sets of 6 bottles of paint for about $12…but I am sure you can find a coupon.
This challenge is Open Until Saturday, October 13, 2007 Noon-EST. Shortly thereafter I will randomly select one participant to win the Santa Claus UM stamp. All entries should be posted and include SOF-Lumiere Resist in the title. If you can't post on 2 peas you are welcome to leave a note here or I will be happy to post if you don't have a blog.
If I can answer any questions please leave a note here.
Thanks for playing!…Far North (Jan)
Sunday, September 30, 2007
Saturday Stampers-Treasures
This week's challenge is to create stamped art representing something we treasure.
After 20 years of living in Alaska I truly treasure nature's colors...particuliarly as we are quickly moving to those 8 months of solid white. So I spend the 3 beautiful months of summer gathering lots of natural materials to enjoy using in my crafting throughout the year. Here the raven (which are plentiful here all year round) keeps a watchful eye over all of nature's beauty. I started with a cream tag and used lumiere as a resist. The wrought iron flourish on the tag and the ironwork border image are Stampinton stamps.
In this second card I used probably the last of the leaves and ferns I will be able to obtain this fall. The background is made by sponging luminere onto the center panel and stamped the background. A transparency covers the entire card...and while that maybe hard to see the distress edges appear far more intense in color than IRL. Sorry I just could capture the halo effect. So while I really like this card and made it first I really wanted to do another that would show better on the blog. So Saturday Stampers your challenge inspired 2 cards this week!...thanks for the fun!
Happy stamping!
Tuesday, September 25, 2007
I think I shall never see a thing as lovely as a tree
TREES...yes, that is the topic for this week's challenge at Saturday Stamper. This is just the 2nd week for the new website and it looks like it is going to bring lots of inspiration.
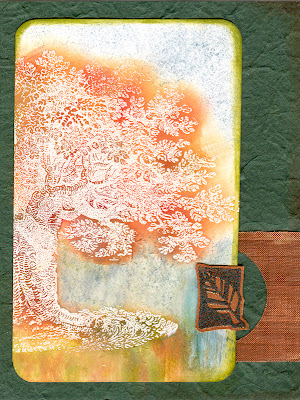
For my challenge I pulled out a stamp that has been in my stash for 2 years. I bought it came to me unmounted as a part of a bag of miscellaneous stamps at a yard sale. When I bought it I found it still had mounting foam on the back which made it difficult to get a good test image...and the fact that it is a huge stamp of a whole tree makes in challenging to use for cards. But this challenge saved it's life as part of my collection--it's finally got it's long past due EZ mount properly fitted. If anyone knows I would love to know what company made it.
For my card I heat embossed the tree in white so I could do a dye ink resist. All inks were added with cut-n-dry foam. The card base is a purchased piece of handmade paper. Copper mesh was punched with a circle punch to enhance the small leaf icon which was made by embossing a Maryse Carrier stamped image. Hope you like it!
Here is a link if you want to check out the challenges at Saturday Stampers .
Sunday, September 23, 2007
Winter is right around the corner!
Our birch and aspen leaves fell mostly this weekend. This is the latest fall I can remember in Fairbanks generally our leaves are down by the beginning of September. It is to be in the 30's this week so it was a busy weekend of preparing for winter. In anticipation of 8 months of not cleaning one's windows it is a big job that is always a part of winter preparation...not to mention the removal of all the plants, the raking of leaves and of course the storage of everything that can be damaged at 40 below.
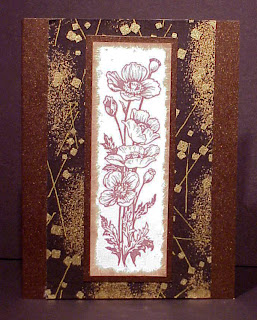
With winter on it's way Jennifer challenged me to using a technique I didn't use all summer--embossing paste. So above is my finished card. All summer I thought about embossing paste and knew I should do it then...I was right it just didn't want to dry today. After several hours it still needed some heat gun encouragement. I mixed pearl ex into the white paste for some colors. The background is stipled Lumiere on black paper. Of course this is some of my final flowers and leaves I dried this season.
Wednesday, September 12, 2007
Fading summer
Frost is in the air--that morning feeling of crispness has arrived...and we will very soon say good-bye to our summer favorites. I created this card with one of the last of this season's pansys from my garden. I enjoyed making the layers with ink and stamps. Thanks Marie for the fun sketch challenge!
Thanks for stopping by!...Jan
Monday, September 10, 2007
Autumn is Here
Wow how quickly autumn arrives...and each year I am still surprised. Most of today was dreary and cloud covered, then late this afternoon the sun came sparkling through and the hills were bright with the gold of birch and aspen trees. I have been preparing by making some cards with late seasonal flowers and stamped leaves. I want to share a few of latest with you. Please know that I was recently selected to coordinate a creative team for the Stamp Shack which means I will probably be cutting back on my blog posts for a while.
Tuesday, August 21, 2007
...and She continues to bubble!
I am having so much fun looking at how to use these bubbles backgrounds with my images. After seeing the branch of leaves hanging over my driveway turn to gold and a few leaves falling I felt it was time to pull out some leaf stamps.
.
The background leaves are stamped in distress ink and the ones in the forground are heat embossed with fall splendor embossing powder by Powder Keg. I love these embossing powders with mixed colors. I feel they add more interest to the embossing. After taking MANY closeup pics this is the best I can capture to show the sparkle. Yes, you can click to get a larger view. The paint to make the bubble background was metallic so it sparkles and the embossing has a great shine. Finally the copper foil leaf was stamped with stazon and a few highlights were dry embossed.
PS...Oh fiddle this final picture is still not showing all the sparkle...hmmm...any other suggestions?? Why not just stop by this weekend and we can make some together!
Sunday, August 19, 2007
Good morning!
Oh what a glorious summer weekend! A perfect time to unwind from a draining workweek. Last night I had fun looking at some bubble backgrounds I had made earlier(see previous posts) and deciding how to incorporate it into a stamped card. This is my result. I used a new flower stamp from Purple Onion Designs and added a fern and flowers that I dried.
I was happy to receive some blog awards this week. A Thinking Award from my stamping pal Ethel and Nice Awards from Stamp Shack friends Barb and Angie It's great to have stamping pals who share my stamping interests! Thanks so much ladies!! I will be giving some careful thought to passing along some awards!
I would like to start today by presenting Dymphie with the Thinking Award! She shared her enthusiasum and directions for the bubble backgrounds. Additionally she is always making very creative works and posting them on her blog-be sure to take a look! Dymphie thank you for sharing with me the fun of pondering over the bubble backgrounds and many thanks Dymphie for your inspirtation!
Finally another thanks to Barb for pointing me in the direction of the automated number selector! Friday I selected the winner from comments on my color study. And the lucky number is...#9. Kim you are the winner of a Basic Grey Infuse 6x6 paper pack--it will be in the mail soon.
I'm off to enjoy another glorious day...hope yours is too!
Wednesday, August 15, 2007
Trying to get ahead
Work has been very intense these last few days...but tonight I decided to get ahead and make 2 full loaves of zucchini bread. It turned out perfect! So glad after I tried to lighten the recipe last week and had a creative disaster. Feeling a tad energized I headed out to the gardens only to realize I had two new zucchini that are now much larger than I usually like to pick them. You ask what to do with all the zucchini...
My top three recipes are-
1. This bread which I call Birdseed Bread because it uses millet in it instead of nuts...yup millet is the little round seed you feed to birds. For people you can buy millet in bulk grain section of most groceries.
2. Zucchini Soup-a tomato base with hamburger and lots of zucchini chucks and Italian spices. Sometimes I use this as a sauce over pasta.
3. Zucchini Casserole--lots of shredded carrot and zucchini chucks with a stuffing topping. After baking my eyes always fool my mind into thinking the carrots are shredded cheese.
If you happen to want any of the above recipes I will happy to e-mail them out but it won't be until this weekend 'cause now I have more cookin' to do! OH my stamps are lonely!!
Monday, August 13, 2007
Rockin Blog
First I want to nominate a person who I met while blog surfing...Nancy hails from the land that is truly the farthest north in the state...where the folks don't see the sunrise for many weeks each winter. Checkout Inkcicles-Stamp Art and Life in the Arctic
One of my stamp pals bounces in several of the same circles and we have enjoy playing in some of the same challenges. Check out Stacy's blog Stacy's Memory Triggers
Ah I have been watching Godelieve's blog for a couple years. If you love making your own backgrounds and want to see some great tutorials Stamping Mathilda Just Paper, Ink and Rubber is the place to go! And if you are new blogger she has some great tutorials for you too.
Some people have so many gifts to share and Jennifer is one of them. A seamstress, an animal lover, a great story writer, and a wonderful stamper who just happens to also be fabulous at coloring. Stop in and see her new blog "Thimbles, bobbins, paper and ink"
Oh-oo I need more than five favs!
But for my last I will select Donna another stamper who LOVES techniques...she is always pulling one pretty one after another.
Check out The Stamp Source
Ladies thank you all for teaching me so much!!
What was I thinkin?
The Nick Bantock ink collection is a part of the Ranger products. They are dye based, acid free ink on a raised square felt pad in a container like the distress inks but it is metal instead of plastic. I bought this set for 2 reasons-I love resist techniques which generally call for dye inks and sometimes I like the vivid colors after working with the quieter distress inks for a while. I do find the colors on the labels are not as vivid as the actual colors. Second reason is that while I had been interested in them for some time I happened to be at the right place for a super clearance deal. I would certainly advise not to pass up a good deal if it comes your way. If you want to take a look here is the link to Ranger Ink
Another following-up to the color study:
One great eye caught an interesting view of my last card and asked if it was embossing powder on acetate. Actually that view is really like an optical illusion. The card is made like the others with the focal stamping image on a wider gold purchased dry embossed paper and then on black paper that I sprayed with Kylon's gold webbing. This spray paint is available in other colors too. I usually spray several sheets outside in the summer so I don't have to worry about how to do it in the cold weather. Donna you have a great eye and I may just try a card like you described--I love playing with acetate!
Saturday, August 11, 2007
A little color study
Ink colors:
Damson Plum
Rose Madder
Deep Turquoise
Vermillion Lacquer
Van Dyke Brown
Lamp Black
Tuesday, August 7, 2007
This one is for the challenge!
Easy as 1-2-3
The challenge on Caardvarks calls for creating a card with 1-embellishment (stickles) 2-patterned papers of course the background but also the 3-flowers are paper pieced and sculpted. Hmm--m okay nothing like stretching out of one's usual styles :-)
The current Stamp Shack's color challenge is pomegranate, olive, black, and tan. Since I don't have any pomegranate paper or ink I gave some serious thought to making some pomegranate tean and pouring it through a coffee filter and using the filter. But then I decided I really wanted to do more with this new plum ink and this combo would work perfectly so I made a slight change to the color scheme.
To make this one I stamp a french script background in Ranger's tea stain distress ink. The resist is made by stamping the flower in embossing ink and adding seafoam white ep then sponging on the Nick Bantock's Damson Plum ink.
Happy stampin!